Showing posts with label crafts. Show all posts

June 29, 2015

Ombre Sea Shell Heart

Last summer we had the joy of going to Myrtle Beach with family. It was such a blast! We made sure to bring home some sea shells to turn into something magnificently crafty.

Going on a year later, I finally figured out how I wanted them! The best part is I just went through the house and found how I wanted it. :-)


What you need
* Solid color cardboard
* Hot glue gun and glue
* Burlap
* Tape
* Frame
* Scissors
* Marker

It's pretty easy, to make on a whim. All the supplies I found around the house - which makes it feel pretty much free!

To Make Your Own
First trace and cut the card board to fit the your frame. My frame is a 8 x 10. The cereal box had a white inside (I think it was a Sams double box) so it worked perfectly behind the burlap.

Next place the card board on top of the burlap. Make sure if there is a "good side" to either that they are facing down. Tap the burlap the back side of the card board as tight as you can. The closest tape I had available was painters tape. I was too lazy to go get duct tape, which will probably hold up better in the long run.


If you haven't plugged in the glue gun, do that! While it heats up you can start laying out your shells where you want them. Now all you have to do is hot glue the shells to the burlap. 


I found that it help for me to put all the shells down where I wanted them on the burlap. Then, I would remove about 3-4, put the glue on the BURLAP, then put the shells back. For an 8x10 I used 4 sticks 3 or 4 sticks of glue. Not sure, since I wasn't counting!


Once the heart was done, I cut a "label"  of cardboard to the size needed, wrote on it, then glued it to the burlap.


Simple enough, but oh so pretty!


Check back in a week to see where it ends up!

What do you do to display your sea souvenirs?

May 02, 2015

Old Fence turned into a Flower Box

Last summer we built new sections of our backyard fence, and as a result we now have old fence wood waiting to be repurposed into many other projects. First on the list, I wanted a box to put on the dresser that is below our TV. I had something like this one in mind.

One weekend Nick came in after working in the garage and showed me the box be built. He set it up and pulled down our Christmas light strand and put it behind the glass jars. Once he turned it on, it was perfect! I was thinking of painting them, like this one I came across, but the Christmas lights wouldn't reflect the same. At first I had only one Hydrangea, but I stopped my Michaels and bought some more this week. Right now there are 12 jars and I only have flowers in very other one. I might add more later. I love these!


I'm still deciding what color I want to redo my dresser in. Black, white, or dark gray? What do you think?


January 19, 2014

Engineer Print Tips

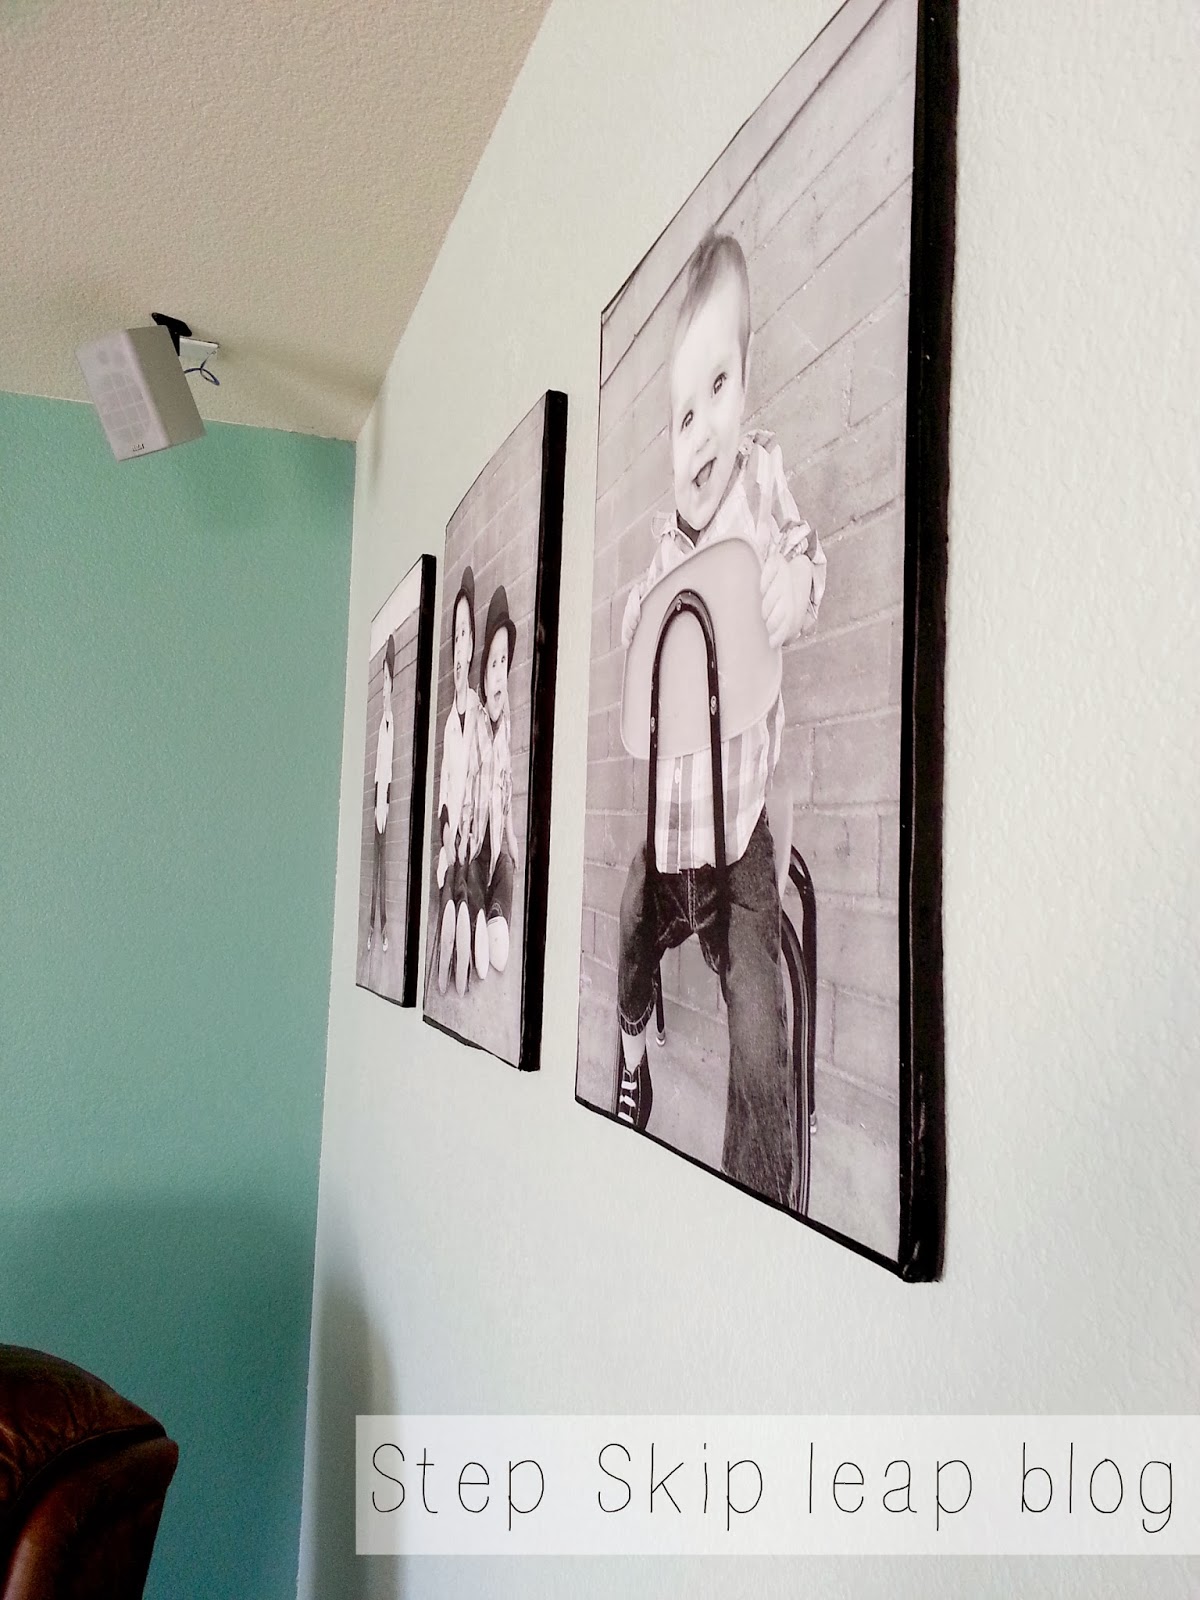
I fell in love with this idea when I saw it, and I finally decided to tackle it. There are plenty of tutorials out there. This one over at Sugar Bee Crafts is the one that I referenced the most. It goes over all the details from choosing a picture to hanging it up.  Here's another helpful tips of the Do's and Don'ts of Engineer Printing from Scatter Shot. I highly recommend reading both of these if you want to try this.

And now, here are a few things I also learned from the process.


Engineer Prints
The pictures are great! I love how they turned out the instant I saw them. You know what is even better? They were taken from my phone. No kidding?!

Styrofoam
The Styrofoam is messy. I did not have a proper cutting tool, so it made an absolute mess. I did at least anticipate that and worked in the garage. Check out here for the warning. I forgot about static electricity, too. They stuck to my clothes and socks.

The lines were slightly uneven when cut and a little rough. The fix? I used masking tape on the edge to help smooth it over, then painted that black. (In retrospect, I guess I could have saved myself some time by just buying black tape.)


Attaching pictures
I used spray adhesive on the back of the photo, then placed it on the foam. It seemed okay except the pictures would unstick a bit. (This may be due to me completing this in my garage during the Texas Ice Storm of '13, but who knows.) I added just a tad of Modge Podge under the corners of all photos. It bubbles too much because the paper is super thin.

I also couldn't decide whether to add a protective layer of something on top or not. My clear spray left speckles, and the modge podge left wrinkles. So I did none. Maybe this just makes it easier to change out the photos whenever you want?


Mounting
Hanging it up with hanging wire and duct tape? It worked 2 out of 3. I kept having one fall. So I bought some of the poster double-sided mounting strips, added them to each of the four corners, and that seems to do the trick.

Overall
It's easy but time consuming. Maybe that's because I made 12 of them (Seriously. No joke. Christmas present people. 12 total. And I still have more foam in the garage!). Maybe not as Christmas presents unless you are crazy, or have time. Although I know my sister-in-law absolutely loved hers, and so it was worth it for me! Honestly, I am in love with the results, but maybe that's because I simply adore the huge photos of my boys.


Hope that helps! Let me know if you've done this or if you give it a try!